Yep, not worth the time - How about splitting parts to dovetail glue together or snap together. Or using a print service like craftcloud3d - i have 10% off code you can use too - https://craftcloud3d.com/ - To order 3d prints - Get 10% off with this referral code:
snap together could work, I’m not sure how long glueing can last under the force of high speed script.
I also considered printing service, but the price to print the whole thing can buy me 2 rolls of PLA.(may it’s just the provider I found is expensive) thx for sharing the code
anyway, now that I have the hand made one I don’t need to loose more of my brain cells lol.
Highly depends on material, glue and process of applying it. With the proper materials and method, it essentialy becomes a single part.
There are even glue types that effectively melt the material for a bit. Which essentialy means it gets welded (usualy these arent as strong though as often some of the compound that caused the melting is causing 'air’gaps in the melted area).
But usualy if you take proper glues, even if not optimal, the connection is going to be strong enough, that even if it starts to fail, you will notice that far ahead in time.
As far as i know, with the melting type thats not recommended to do. As the vibrations can weaken then bond itself. And im not sure if these glues are normaly safe to handle, as its often used for steel, and i dont know how many there are for plastics and how well they work. But hey, if you find a good one, you can be sure its going to remain sturdy as its effectively a weld. And on large surfaces i dont think small air bubbles matter. Especialy if you design it in such way that there is plenty of margin.
For plastics you can weld the material through friction itself, as that can heat the materials also enough to melt them. But from my experience, these are often still less optimal compared to a traditional glue as that method has a few downsides to work with: you must ensure enough material gets molten, which on larger surfaces is nearly impossible, and on small surfaces, you have to consider using extra material as this friction will grind some of it away to the sides (not helping the weld at all).
Traditional glues are often optimal.as that is still the most reliable way to avoid airgaps (especialy when you vibrate those out).
Also, as traditional glues can harden slowly, it does enable vaccuum chamber usage to get rid of bubbles.
has anyone tried just melting in some threaded inserts into the handy body directly? I’ve done that to some 3d prints and they’ve held up fairly well. I haven’t taken apart the handy but it seems like it has plenty of extra wiggle room in the plastic for some modifications.
I have one of the semi-official printed cup holder things for the handy that has worked out alright, but if you could just screw it into a 1/4" cam or VESA mount directly it would seem more stable
I really like Abdulis design to be able to use the Handy with controls away from the user. It prevents a pinch and allows to really go low vertically. The only slight drawback is the torque load increase due to the slider being extended horizontally.
Link: clip-on slider extender by Abdulishandy - Thingiverse
Creative approach! The only drawback of this design I think to see is that if for some unfortunate reason the male organ would leave the sleeve, it has a very high change of impacting the object.
Your older design is not circular and therefore has at least 3/4 less change of such catastrophe.
Thanks - There are a few designs there that should generally cover all use cases and I will add as I go and as requested to - For example, with any design, reduction to trim excess can be helpful for improvement. I could potentially reduce the 120 diameter on the bigger holders but need to still allow for bigger sleeves so could probably only shave about 10mm and add more spring rate. This spring system allows for flexibility to contour slightly and I will probably develop this further with multi sections of flex than just the 2 at present but should be plenty for now - No need to over complicate things etc.
As for the specific revised sleeve holder - Use with longer sleeves that are flared should allow for minimal gap time between cock out of sleeve and this could be adjusted with stroke length settings too. Adjusting for angle with a hands3 mount that is wearable with tactical belts or on a vesa compliant monitor mount with tilt and pivot, should help keep things best lined up too.
As to the circularity matter, it is the same arch but wider to allow for better strapping down.
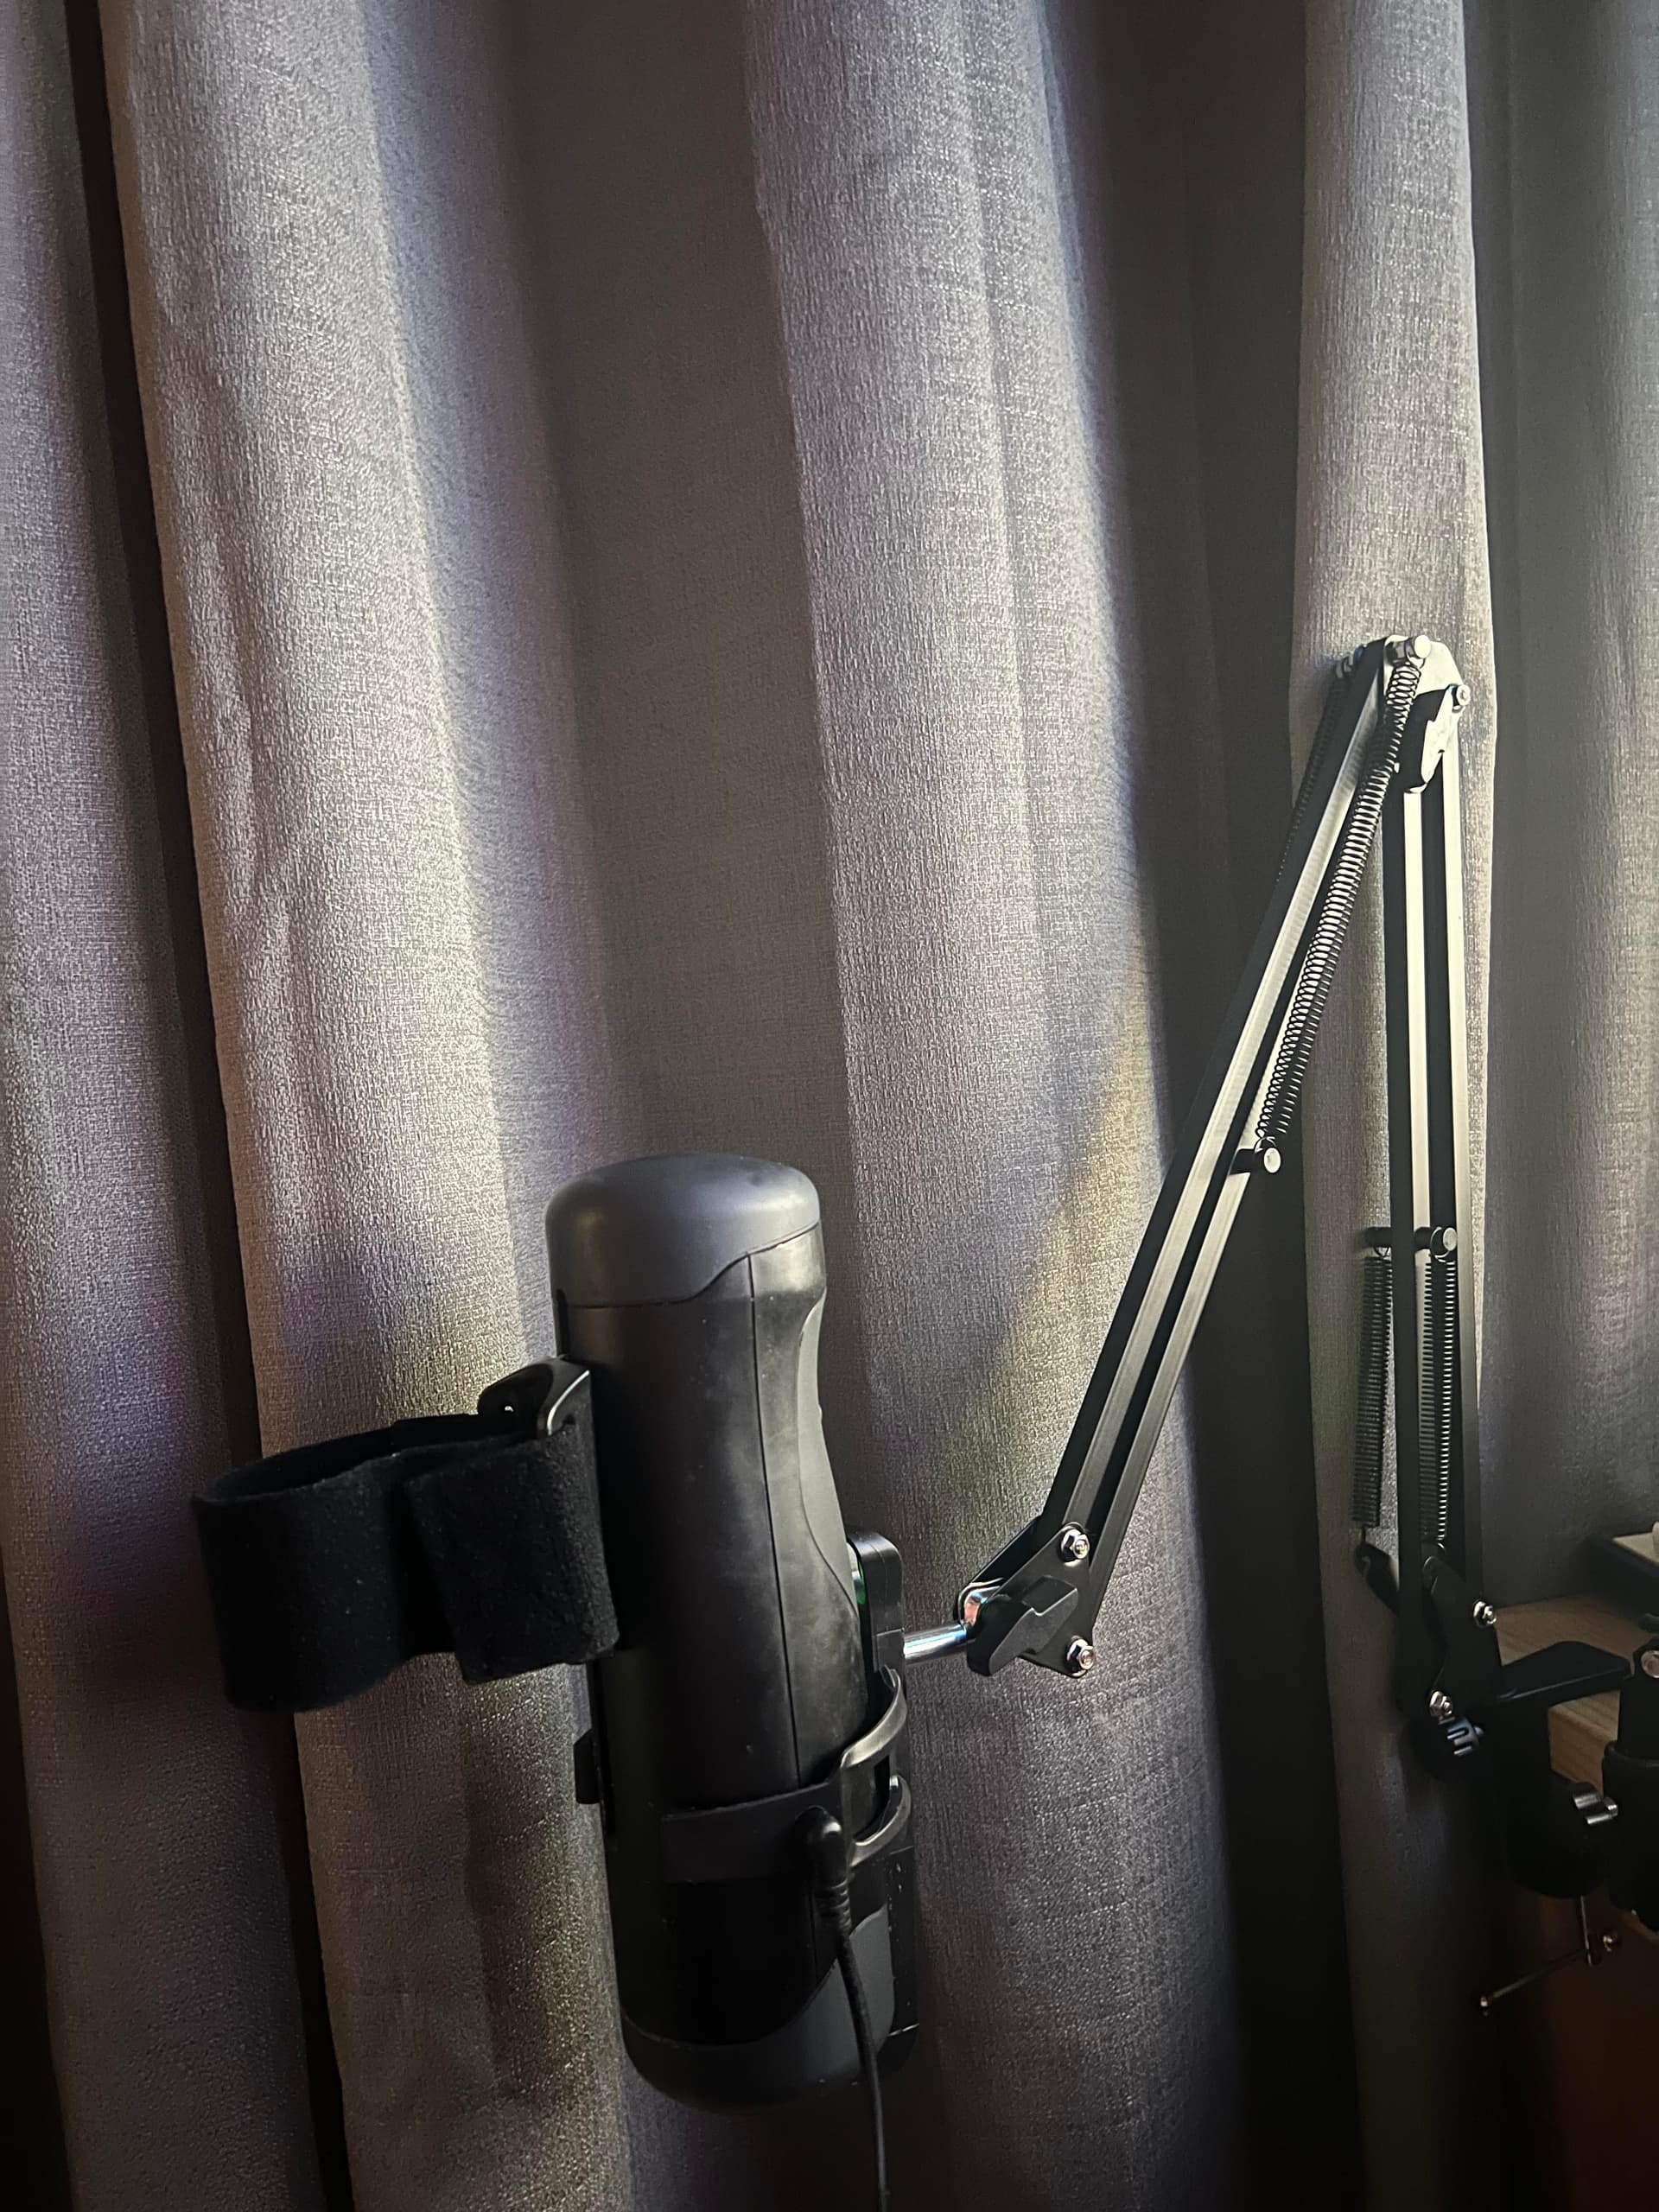
i know this will get worse over time because of the tightening of the angles and shit, but this fit almost too well. the cup holder is screwed directly onto the mic arm and i did have to make a hole for the power cable, but other then that it works as intended and looks nice enough. (remove handy and it doubles as a cup holder for sim setup) 20$ total
Maybe I’ll only have ever seen cheap mike arms but the one I know could be pushed easily because of leverage, regardless of how tight I tried to screw it. I somehow can’t imagine this setup working for me.
I just upgraded from the solace to the handy (it’s still in the mail) but I was wondering if anyone has used the solace desk clamp/mount for the handy? it’s pretty convenient to me, I’m a desk only user. kinda needs to be discreet and hide-able so that set up is perfect…and free! I have a 3D printer too so any input is welcomed!