How to make your own Passthrough videos!

TLDR;
Extract this github repo and read the readme to make your own passthrough videos!

Hello! :nerd_face:

As some of you may know I’ve been investigating the best way to create passthrough videos on my own because there’s so little Passthrough content out there :frowning:

Problem

For some videos they tend to either be AI-generated Passthrough done through some form of Semantic Matting/SegmentAnything that looks blobby and keeps the male actor body, which can be a bit immersion breaking:

Or it’s already greenscreened from the start;

but for some reason the way the alpha matte is packed into the videos (Those red masks) appears to be anti-aliased to the point that you could literally see the pixels + sometimes looking blobby too due to some kinda matte erosion:

So i set off on a journey to find the best way to make passthrough videos to enable my escapist fantasies :upside_down_face:

Research and Development

I tried a whole bunch of methods to try to get a good result:

  1. SegmentAnything
  2. Mask2Former
  3. SemanticGuidedHumanMatting
  4. Media Pipe Selfie Matting
  5. High-Quality Segmentation Refinement

Most of these encountered problems trying to identify “what is a human” in VR distorted frames, i believe it’s because these models were not necessarily trained on distorted VR images of humans so it can’t do a good enough job!

And then i found this! :smile:

BackgroundMattingV2:

A simplified explanation is that:

Using the power of neural networks, it’s able to intelligently compare a still “cleanplate” without anyone in it, and use that to create mattes on objects that are moving on top of that “cleanplate”

(which means it does not need to know what a human is and try to matte those out, like typical semantic matting )

Pros:

  1. Retains alot of fine hair details!
  2. Quite fast to process each image!

Cons:

  1. You need to build your own cleanplate from all the different frames of the video using photoshop to get any satisfactory results!

  2. You need a lot of disk space, and you need to pre-render the frames into images.

  3. Lots of setup work required + clean-up work after to get something decent especially if the male actor moves around too much.

  4. Only really works for scenes where i was able to build cleanplates out of, so no scene or position changes.

Then i found that the authors of this paper published an even better version of this but addressed the cleanplate problem!

RobustVideoMatting:

It basically works the same but it uses the last 4 frames as “memory” to build up the cleanplate.

Pros:

  1. Robust, works with lots of different positions and scene changes!
  2. Does not require manual work to make it work and the matting quality scales by footage quality! (if you can get extremely high-quality footage such as those from JAV studios, it makes it literally mindblowing how much hair detail gets retained )
  3. The male actors tend to get keyed out because they are mostly stationary so that’s great!

Cons:

  1. Really fumbles on long form videos, will crash and burn and you lose hours upon hours of processing!
  2. On long form videos the matting seems to “lose the plot” per-se, i believe this might be due to memory problems.
  3. You can’t stop it once it gets going so you basically will need a dedicated machine running to keep it going.

The Pipeline:

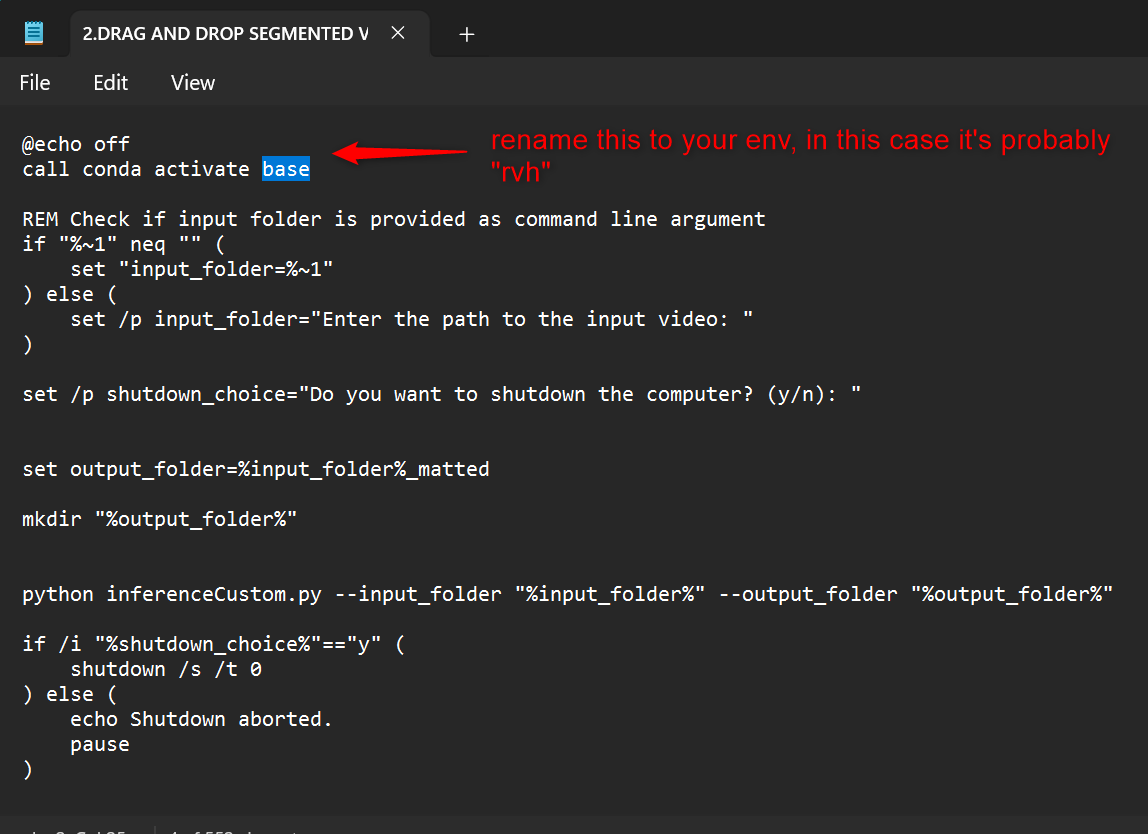
So to address these problems, I basically created a pipeline assisted by Batch files and a python script.

The pipeline works by:

  1. Cutting up the original video into segments of a few seconds each ( how many seconds is up-to-you really! )
  2. Inferring on each of those video segments
    2.1. If a segment fails or the process is stopped, it will be recorded in a .json file and can be restarted later.
  3. After Inference, we combine the matted segments back together into one video
  4. Copy audio from original video to combined matted video

It improves on the original RVM Codebase because:

  1. You can stop the process at any time and just restart it and it will restart from the last file it didn’t process.
  2. If a decoding error happens, it will only kill that segment and move on with the rest so you can fix that after and restart the process
  3. Makes it a lot more viable to process 8K videos on lower-end systems without as much VRAM ( theoretically it should work since we’re only loading in a few seconds 8K video each time )
  4. Makes it viable to distribute processing across different machines so it’s literally perfect for bigger studios with the resources to do it

Feel free to modify the code and submit pull requests if you’re technically-inclined and want to help out :slight_smile:

I hope this will allow a lot of people to create more passthrough videos or maybe even bigger studios to start adopting this so we can have better passthrough videos!

Also I see it a a way to give back to this community :slight_smile:

Also here’s a catalogue of my funscripts if you’re interested in funding my escapism

16 Likes

If this works as well as the images suggest and is actually usable, you’ve just become a hero of VR porn!

I’m curious about how long processing takes, of course it’ll rely on PC specs. Does it rely more on CPU or GPU, I’m guessing GPU? What kind of processing time could one expect with, say, an RTX 3080?

I don’t understand how to install it yet. But it absolutely looks like it’s worth figuring out!

1 Like

Used your repo. Pretty cool. I might send a PR to fix your install a bit. you dont want to install into base like that. but a quick question. Mine generated id give it a 8/10. How would I go about fixing up the rest of it?

1 Like

I believe it depends on the GPU! :slight_smile:

For me i have an rtx 4060 laptop GPU and it takes me on average:
Video Duration x 100!

So a 12 minute video will take about 1200 minutes to process so 20 hours?

My wild guess is that a 3080 might have the same or better processing power than my laptop GPU tbh! :sweat_smile:

Oh yeah for sure!

I set it up to install into base because that’s simply the easiest way to go if you’re not well-versed in python or environments in general :slight_smile:

Definitely if you’re technically inclined, it would be best to install into a new conda env and then modify the .bat file to call “conda activate [your custom env]” in the first line!

Feel free to send a PR!

I’m pleasantly surprised it’s working for someone else tbh! :joy:

I find that re-segmenting the videos will fix up those source segments that failed to process and then restarting the inference process will only re-process the ones that failed!

Yeah it worked fairly easily, it requires some technical knowledge but it wasnt too bad. I started putting it into a webui and combining most of the steps. It should be done soon. Like this, see how it missed part of the ground there. You think resegmenting will fix? I was curious how does it know what it is segmenting out to begin with. And do you know if theres a way to set some parameters or give it guidance to achieve better results?

2 Likes

Python noob here. I would love to get this to work so I can try it out. Unfortunately, I’m getting this error when running the requirements.txt. Any assistance would be appreciated!

Code
(base) PS C:\Users\REDACTED\Downloads\RVM_ON_SEGMENTS-master> pip install -r requirements_inference.txt
Collecting av==8.0.3 (from -r requirements_inference.txt (line 1))
  Using cached av-8.0.3.tar.gz (2.3 MB)
  Preparing metadata (setup.py) ... done
Collecting tqdm==4.61.1 (from -r requirements_inference.txt (line 2))
  Using cached tqdm-4.61.1-py2.py3-none-any.whl.metadata (57 kB)
Collecting pims==0.5 (from -r requirements_inference.txt (line 3))
  Using cached PIMS-0.5.tar.gz (85 kB)
  Preparing metadata (setup.py) ... error
  error: subprocess-exited-with-error

  × python setup.py egg_info did not run successfully.
  │ exit code: 1
  ╰─> [18 lines of output]
      C:\Users\REDACTED\AppData\Local\Temp\pip-install-dxnvjkom\pims_79534a4d63704eb294b740977abc49b3\versioneer.py:467: SyntaxWarning: invalid escape sequence '\s'
        LONG_VERSION_PY['git'] = '''
      Traceback (most recent call last):
        File "<string>", line 2, in <module>
        File "<pip-setuptools-caller>", line 34, in <module>
        File "C:\Users\REDACTED\AppData\Local\Temp\pip-install-dxnvjkom\pims_79534a4d63704eb294b740977abc49b3\setup.py", line 22, in <module>
          version=versioneer.get_version(),
                  ^^^^^^^^^^^^^^^^^^^^^^^^
        File "C:\Users\REDACTED\AppData\Local\Temp\pip-install-dxnvjkom\pims_79534a4d63704eb294b740977abc49b3\versioneer.py", line 1405, in get_version
          return get_versions()["version"]
                 ^^^^^^^^^^^^^^
        File "C:\Users\REDACTED\AppData\Local\Temp\pip-install-dxnvjkom\pims_79534a4d63704eb294b740977abc49b3\versioneer.py", line 1339, in get_versions
          cfg = get_config_from_root(root)
                ^^^^^^^^^^^^^^^^^^^^^^^^^^
        File "C:\Users\REDACTED\AppData\Local\Temp\pip-install-dxnvjkom\pims_79534a4d63704eb294b740977abc49b3\versioneer.py", line 399, in get_config_from_root
          parser = configparser.SafeConfigParser()
                   ^^^^^^^^^^^^^^^^^^^^^^^^^^^^^
      AttributeError: module 'configparser' has no attribute 'SafeConfigParser'. Did you mean: 'RawConfigParser'?
      [end of output]

  note: This error originates from a subprocess, and is likely not a problem with pip.
error: metadata-generation-failed

× Encountered error while generating package metadata.
╰─> See above for output.

note: This is an issue with the package mentioned above, not pip.
hint: See above for details.

From my basic understanding, this seems to be the main issue?

AttributeError: module 'configparser' has no attribute 'SafeConfigParser'. Did you mean: 'RawConfigParser'?
      [end of output]

First of all, thanks for sharing your method.
I have tried your repo, the passthought has been pretty good, the bad thing is that in the video some images are frozen. I’m going to try with other videos to see if it works better (the resulting video occupies much more, but as I’m a newbie in python I haven’t seen if it can be changed).

With a rtx 4080 it took me about 10 hours for a 10 min video.

1 Like

Amazing!
Do you have some resources on how to make python codebases work with WebUI? I’d like to learn more about that tbh! ( just for other general SFW purposes)

Hmm tbh I don’t think there’s a way to fully remove those parts that it misses and i don’t think resegmenting will fix that!
I’d have to look at the paper again to figure out, but some parameters that can be modified are:

  1. Downsampling:
    Lowering the value makes the matte fuzzier and less defined but with much faster inference speed, at some point it becomes too blobby! (From InferenceCustom.py)

  2. Sequence Chunks, I couldn’t get this to work, but this supposedly allows for parallelism which should make the whole inference process faster?
    From inference.py:

It would definitely be cool if those can be exposed as parameters on the webui!

I was experimenting with increasing the number of recurring frames it compares against to improve the matting (theoretically it should work??) but i couldn’t extend the code successfully because I’m no data scientist, just a horny nerdy man

My other gut feeling is that it needs more training on VR porn dataset to fully eliminate these artifacts

Nice that seems pretty consistent to me!

For the frozen images it could be any number of reasons!
So the steps to troubleshoot is:

  1. Go to the “segments_matted” folder and find the video segment that had frozen frames
    eg. Output_0001.mp4
  2. Go to the “segments” folder and find Output_0001.mp4, play it in your media player and see if it skips/weird pixel artifacts/purple screen
  3. If it does, then that source segment failed to encode properly when segmenting:
    3.1. Resegment the video
    3.2. Copy the resegmented Output_0001.mp4 and pop it into a new folder, maybe name it “FIX_ME”
    3.3. Run inference on “FIX_ME” folder
    3.4. Once done, copy “FIX_ME/COMPOSITE/Output_0001.mp4” back to the “segments_matted” folder
  4. If not, try the same steps as above but without resegmenting the video.
    4.1 if that still does not work, you might be running out of VRAM or your specs ain’t strong enough (which doesn’t seem likely with your RTX 4080) :upside_down_face:

My inkling is that the source segments failed to encode properly :slight_smile:

1 Like

Ah by any chance do you already have some form of environment or packages setup in your base conda environment? or is this the first time you’re doing this?

Because It looks like PIMs is trying to reference an attribute that does not exist in your current version of “versioneer” package

If this is the first time you’re doing this and you’re not using base conda environment for anything else:

Could you try:

  1. Open Command prompt
  2. Conda activate base
  3. pip install pims

It should try to find the most applicable version of PIMS to install now :slight_smile:

Noticing a tiny bit of difficulty on a recent video i’m working on:


The color of the background is really close to her haircolor which makes it’s a little fuzzy (even though it could still capture that hairstrand) so i guess this does show a slight limitation in that you’d get the best result only in videos where the actress’ hair or skin color is very different from the background

Though tbf, it would be difficult for a human rotoscoper to do this properly simply because the pixels are so close in color, especially the back of her head

oh i had it in a gradio webui but i am also a freelancer and had to get back to working on some client projects. But you can check out https://www.gradio.app/. Its pretty easy to work with. I can restart on the webui at random points. If it would even be worth the effort though, im not sure. Depends how far you want to develop this and how simple you want it to be.

And addressing the quality of the result. The original repo only really goes into adjusting the downsample ratio. Beyond that I dont think it offers much else in terms of customization. It sucks because it took like 12 hours to process and the result was poor. So going through another 12 hours with a slight adjustment in the downsample ratio is extremely ineffieicnt.

One idea I had was that I use davinci resolve pro for video editing and it has a magic mask feature AI that is pretty good. I havent taken the time to figure out how to clean this type of segmentation up. But the idea here being creating a pipeling from the segmentation/masking into resolve.

1 Like

check this one out. its like if i had some ability to manually adjust things i couldve easily cut a lot of that guy out

It is a sin against the python gods to be using the base environment to install into. I sent a PR to handle this. It may be confusing if youre unaware what it is doing but. Trust me, the python virtual environment is mandatory and it will cause you a lot of headaches if things arent done right

As for his error, it actually looks like a python version issue. The repo youre using requires python 3.8 which is 4 versions prior to current. You dont specify this version with conda. So it can be an issue. I also addressed this in the PR

the fix here is then.

conda deactivate
conda create --name rvh python==3.8
conda activate rvh

now you can pip install things. It will use the rvh python 3.8 environment. Make sure if youre in an editor or IDE like vscode, it also has to be set to the same environment.

you may also run into an issue with cuda and torch. nvcc --version will tell you what version of cuda you have, this will then dictate which string you use to install the torch libraries.

3 Likes

Oh that’s cool! Definitely gotta take a look at that! Thanks!

I wonder if it’d help to have a script that processes only one single segment with a list of downsample ratios? (maybe 0.1, 0.25, 0.5, 0.75, 1.0)

Then we see which ratio gave the best result and use that ratio for the processing of everything else?

Oh i tried something like that when i was doing background matting v2 ( the output from background matting v2 most of the time didn’t manage to cut out the male actor so i used runway ML to try to segment the male actor; then use that mask to subtract against the alpha)

I would definitely go with that if i wanted the matting to be perfect but for me, i’m happy with the male actor occasionally popping into existence as long as i’m focused on the actress

:upside_down_face: forgive me Guido for i have sinned, but yeah i agree having a separate python venv is the best way to go!

Not sure why but I’m not seeing the PR!

But your changes are welcome!

@WIZARD

His solution is better, but after doing the above, you’d probably need to repeat step 3.3 to 3.6 ( in the github readme ) to get this new conda environment properly setup

then you’d need to modify “2.DRAG AND DROP SEGMENTED VIDEO FOLDER HERE.bat” to use your new “rvh” conda environment

1 Like

I did see something about Python being the issue in a unrelated github issue, but will give this a try and see if it works, thanks for the help guys!

edit: worked successfully. I did run into some other issues such as opencv not working from one of the .py scripts, but I realized I forgot to put conda in my system paths.

1 Like

yeah that might work. or maybe theres a better resolution to work with. that cowgirl screenshot i shared is from an 8k vr video.

1 Like