DIY Handy Hands Free ideas?

Hi y’all! Here’s my idea for people looking for a lying-down solution! Has been working great for me and isn’t terribly expensive to craft and parts are easy to find, though you will need to have a few tools on hand.
1

Parts needed:
3 6 x 1/2 metal screws (can be found at Lowe’s or other hardware stores)
2 1/4" x 3/4" machine bolts
2 1/4" hex nuts (found these along with the machine bolts in a variety pack at Harbor Freight Tools)
1 4-inch corner brace (4 pack at Walmart)
4 zip ties (longer ones are better)
bike bottle cage (the one I used is from Walmart, called Zefal Pulse Handlebar Bike Bottle Cage)
2 2 lb dumbbells
plastic cutting board
crafting foam sheet with adhesive backing
2
3

Tools needed:
power drill
3-1/2" hole saw
3/32" drill bit
1/4" drill bit
screwdriver
ratchet set

Notes: You’re free to improvise with whatever materials you can find, but as far as the cutting board goes, stay away from the wooden ones unless you want splinters on your junk! It doesn’t even have to be a cutting board, but the plastic is much sturdier and can withstand the force of the Handy.

The procedure:
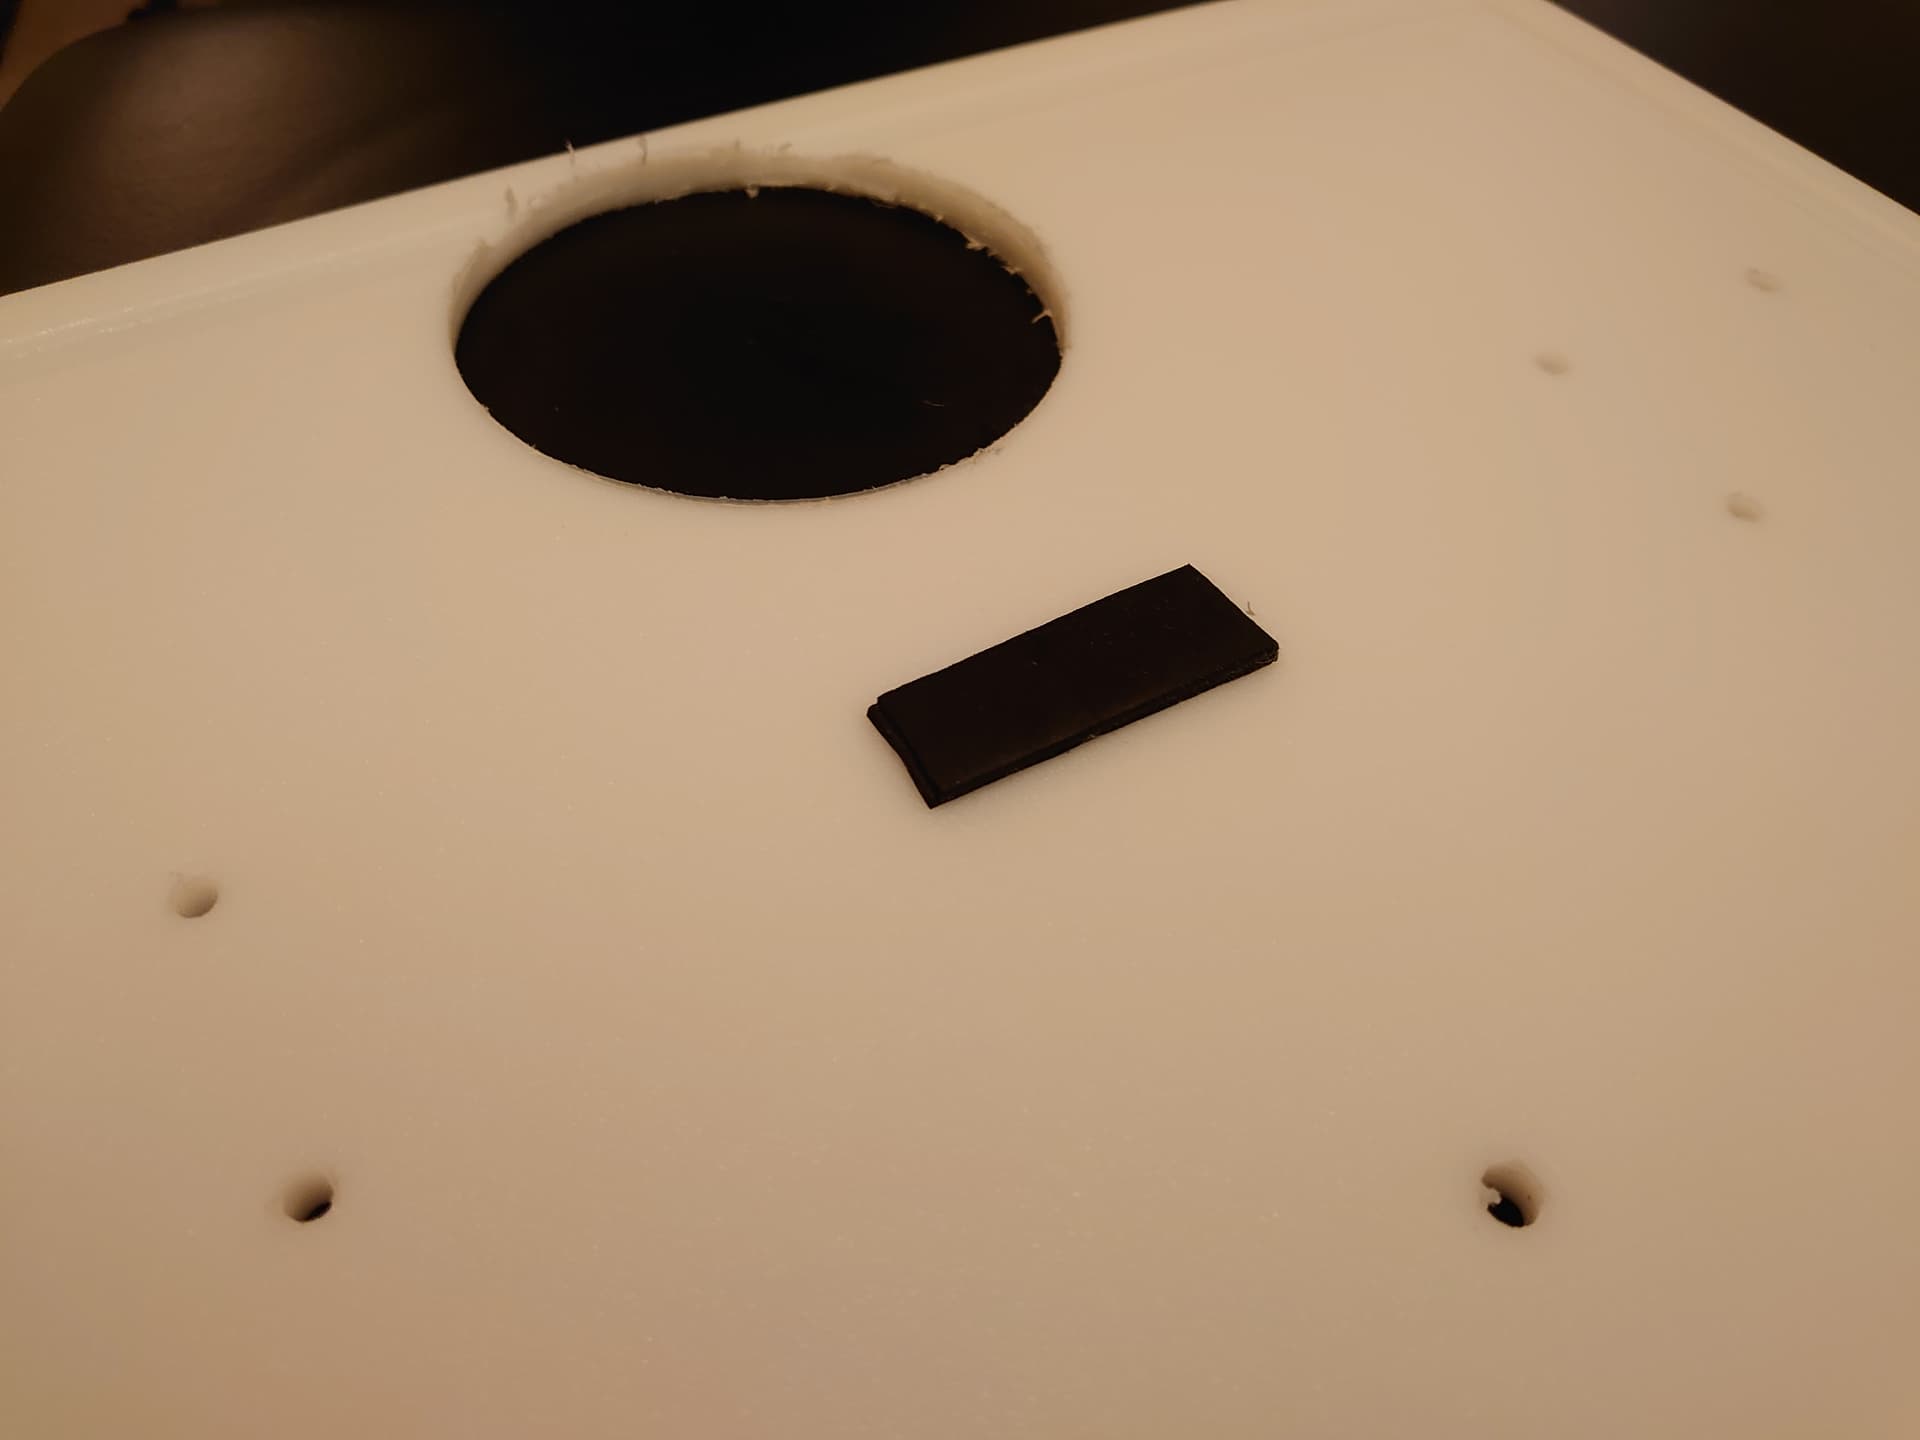
First you’re going to start by drilling a big hole toward one end of the long side of the cutting board using your hole saw and power drill. This is the hardest step and will be even more difficult if you have a weak drill! Make sure the hole saw you’re using is meant for use on plastics. Since cutting boards are supposed to withstand… cutting, it might take some time and effort, but hang in there! Side note, the cutting board I used was about 0.7mm in thickness, so the thicker the board, the longer it will take to cut all the way through. After you get the big hole out of the way, the rest is relatively easy.
4

Next you’re going to take your bottle cage and drill 3 holes in it with the 3/32" drill bit like in the picture. Afterwards, you’ll want to put your Handy with your preferred toy attached in the bottle cage to gauge how far to screw it away from the big hole. Once you find your perfect spot, remember the position and remove the Handy from the cage, then using the drilled holes in the cage, drill pilot holes into the cutting board using the same 3/32" drill bit. Afterwards, you can screw in the 6 x 1/2 metal screws in the cage and cutting board.
5
6
7

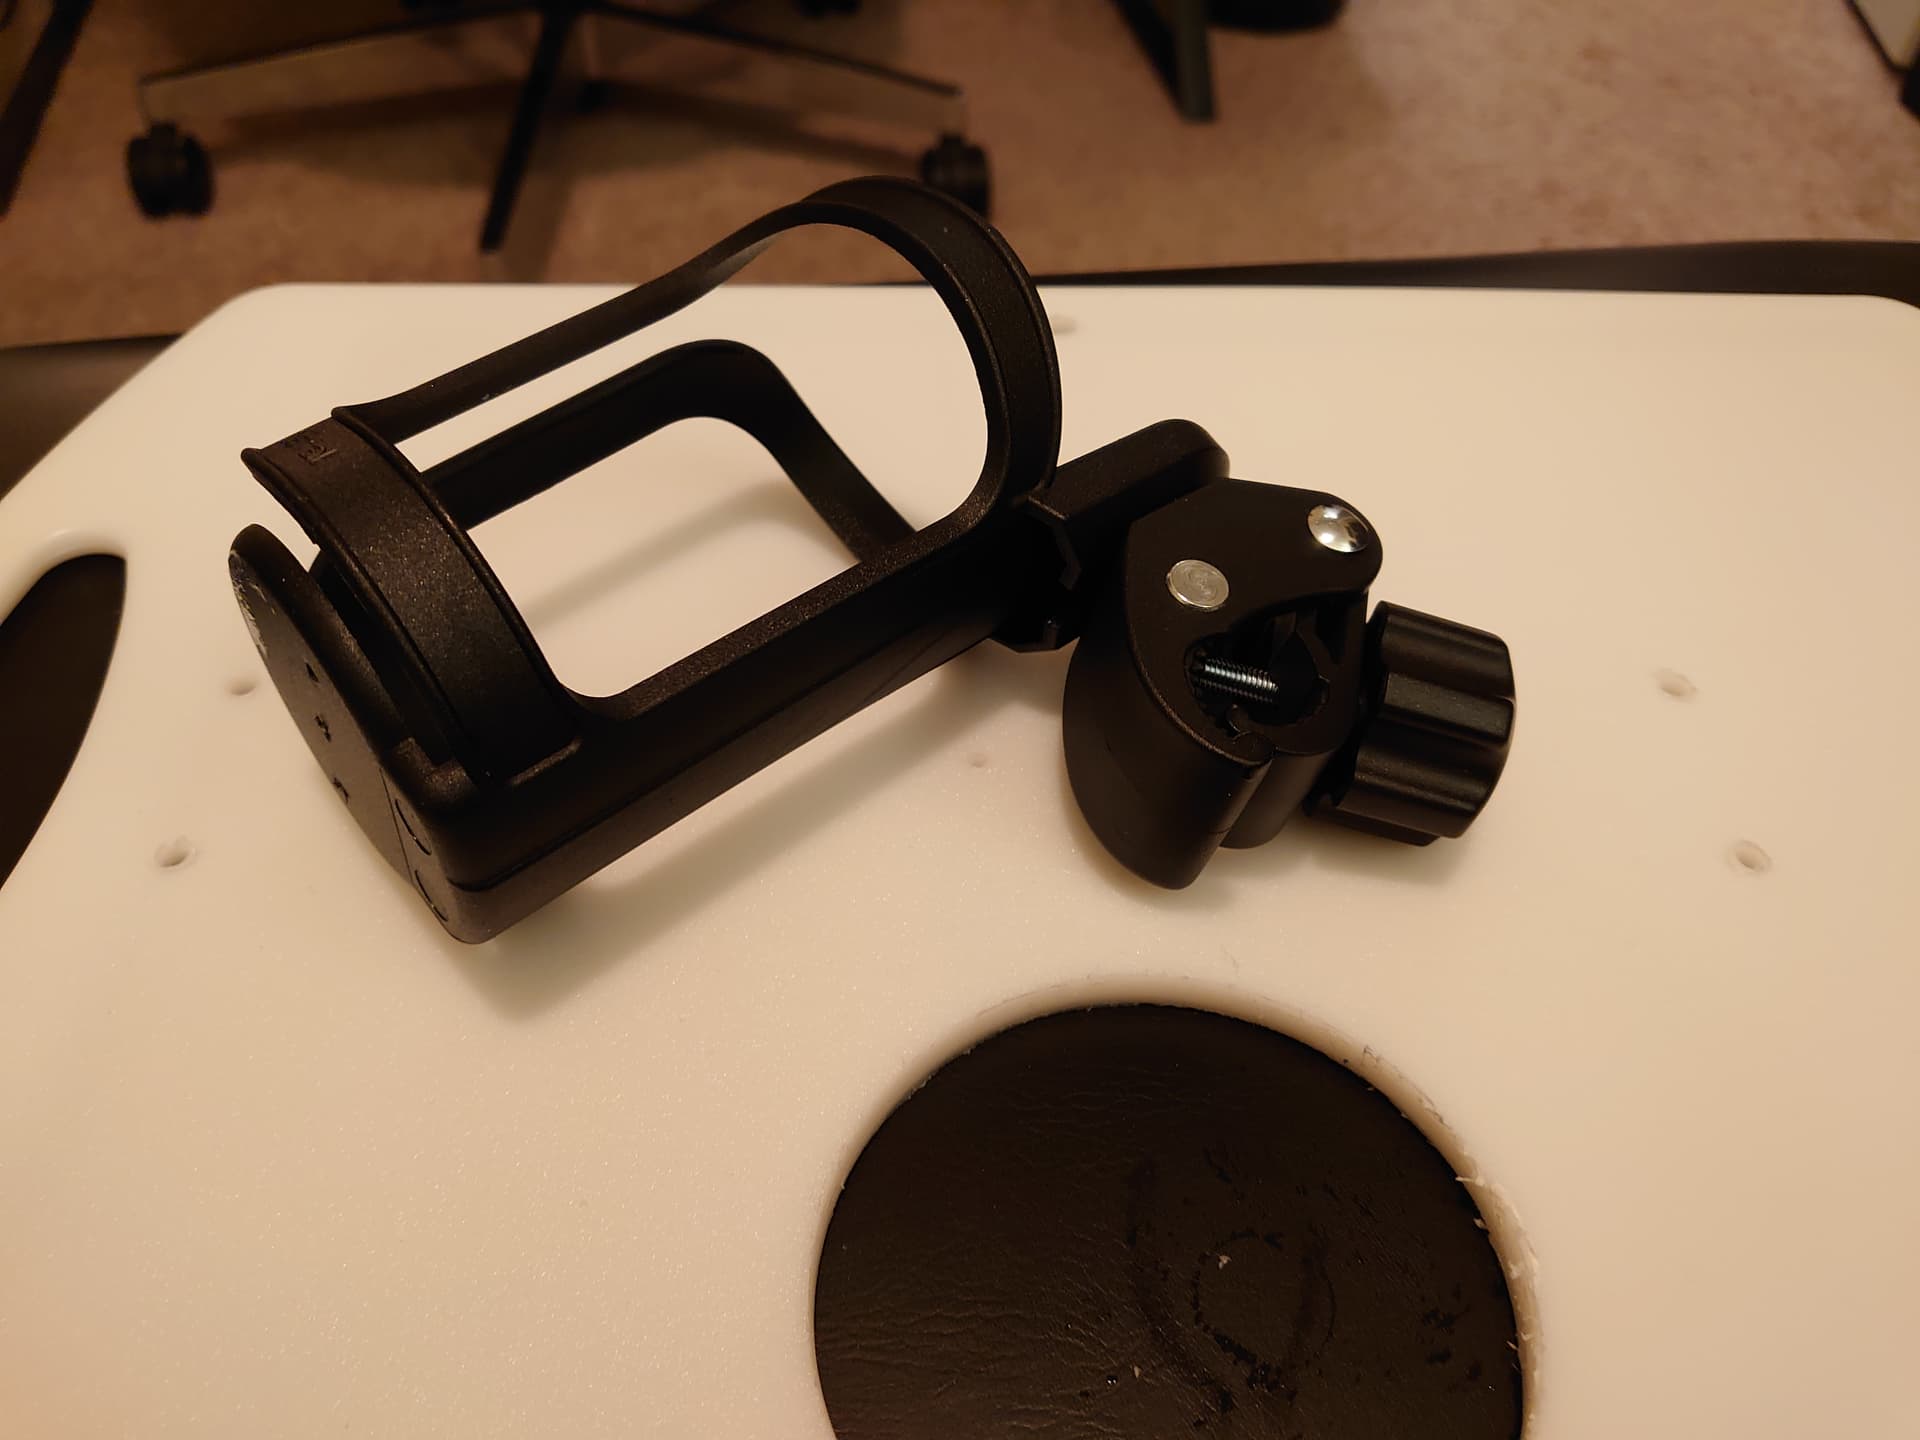
You’ll notice after the cage is screwed in that the spine kind of bends toward the big hole, which will lead us to our next step. The cage should have some knob in the back that would allow you to attach it to bike handlebars, go ahead and remove that by pushing downward and it should slide out. Take your corner brace and slide it into the opening where the knob went and keep the spine of the cage straight up. The tip of the brace should just barely be inside the opening, but it doesn’t need to be any further in.
8
9

Next you’ll need to drill some holes into the openings of the brace facing the cutting board using the 1/4" drill bit. Then you’ll insert your machine bolts from the underside of the cutting board and then tighten the nuts through the top. The purpose of this brace assembly is so that the Handy doesn’t wobble forward during use, which would create uneven stroking.
10
11

Now you’re going to notice that those screws you inserted through the cutting board will be poking out the bottom, which would not feel good against your skin during use, so you can simply cut a piece of your adhesive crafting foam sheet to cover the sharp ends. Don’t be too careless in cutting the foam since you’ll need more of it for this next part. To keep the bottom of the Handy sitting straight, cut a circular piece of foam to stick on the bottom of the Handy so that the screw heads on the bottom of the cage don’t rub against the Handy directly. Next you might notice that with your Handy sitting in the cage that the arms of the cage kind of get in the way of the drive path, so you can easily fix this by sticking some more foam sheet onto the sides of your Handy. I used four rectangular strips of foam, double stacked on each side so that the added width will bend the arms of the cage out more to allow the drive to move uninterrupted.


19


18

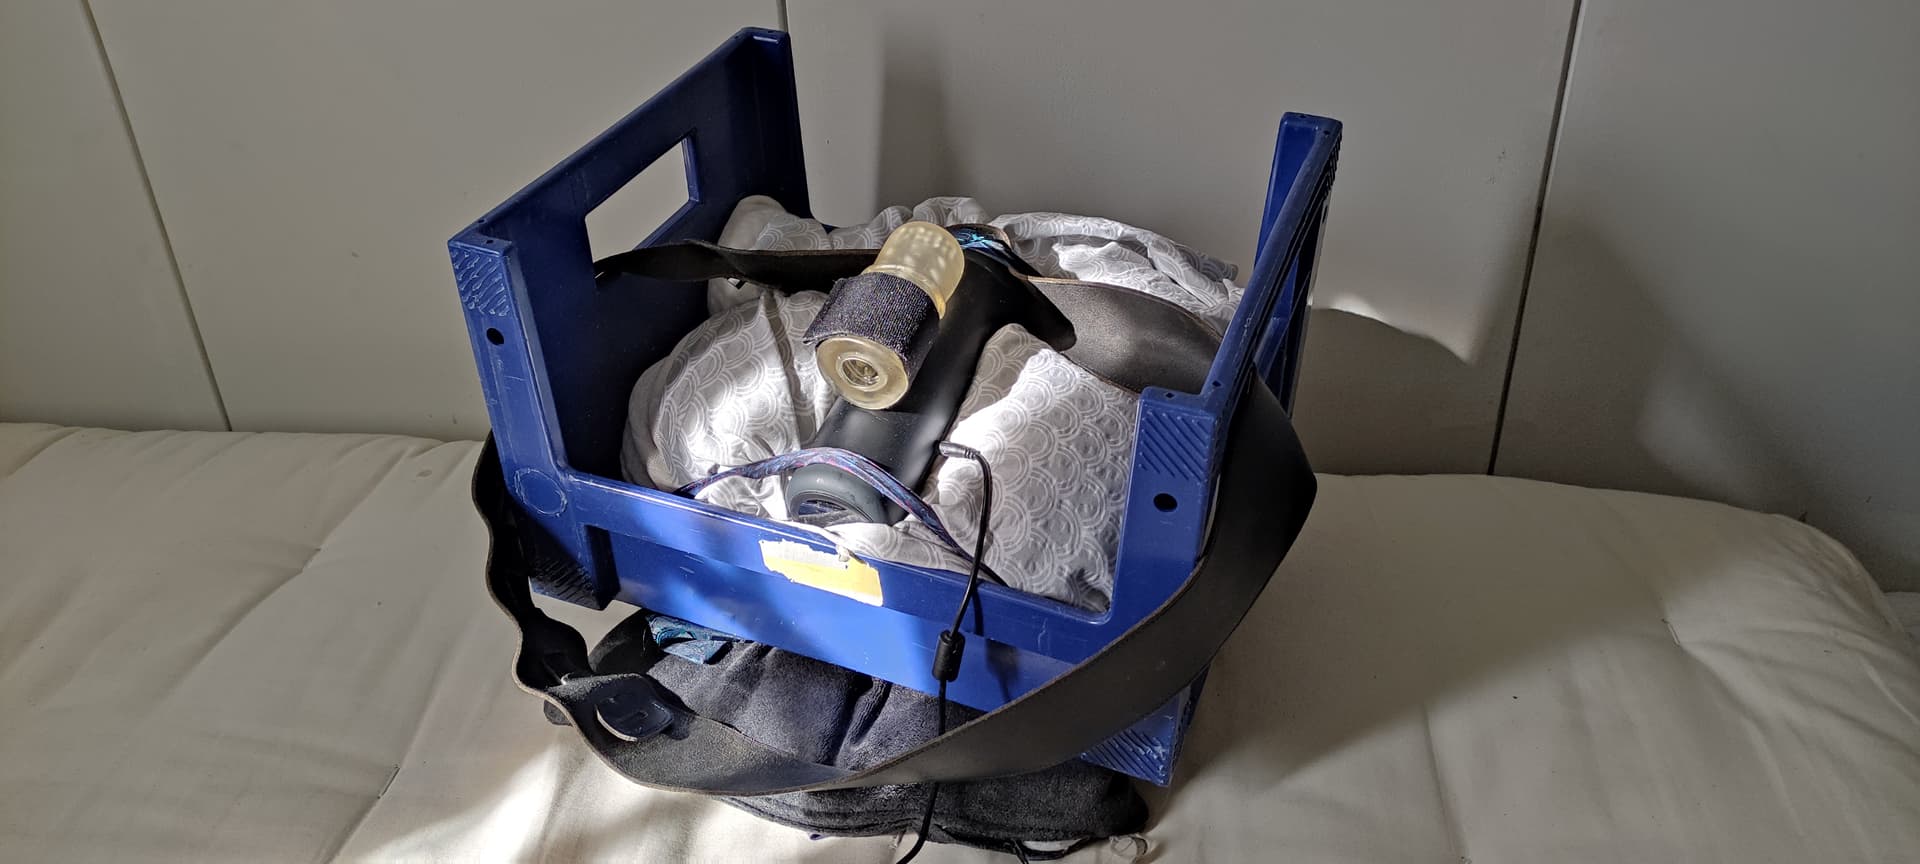
The last step is kind of optional, but depending on what toy you’re using, the weight of the assembly might cause the cutting board to move around uncontrollably. You can just use your hands to hold the cutting board down, but then it wouldn’t be truly hands-free. All you have to is place a 2 lb dumbbell on each side of the cutting board and drill some 1/4" holes around them. Then you just have to feed the zip ties through those holes and tighten them to keep the dumbbells in place. Snip the excess and voila! Now you can enjoy your Handy lying down without having to hold it at all!
13


15
16
20

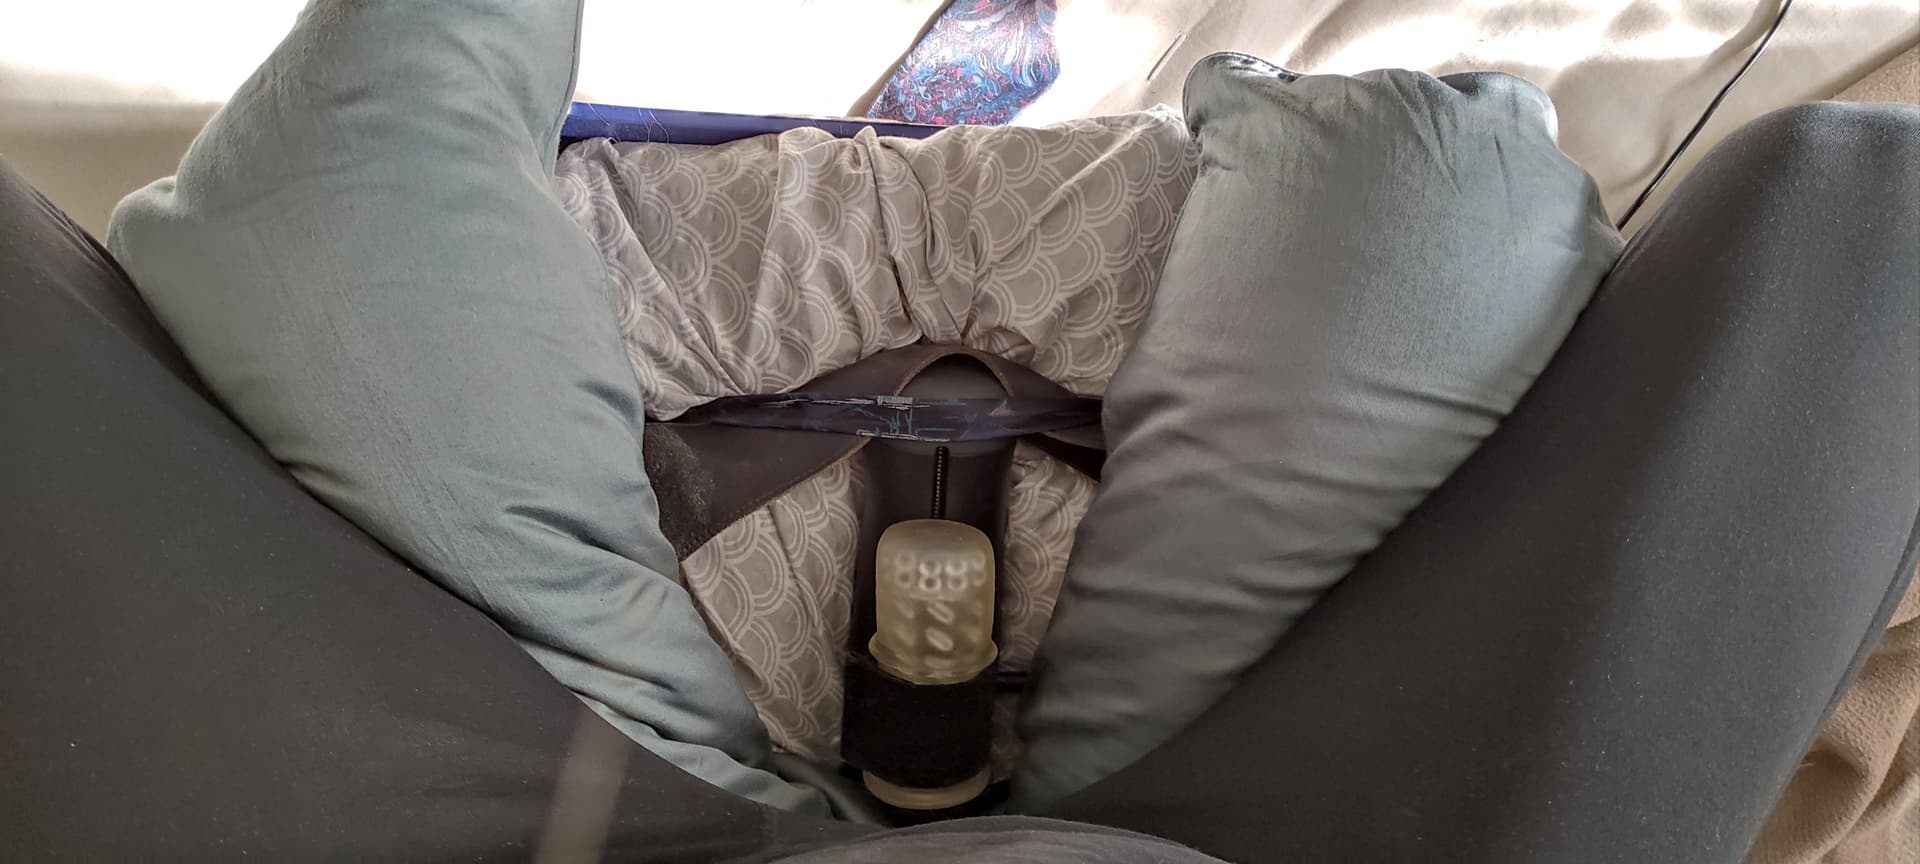
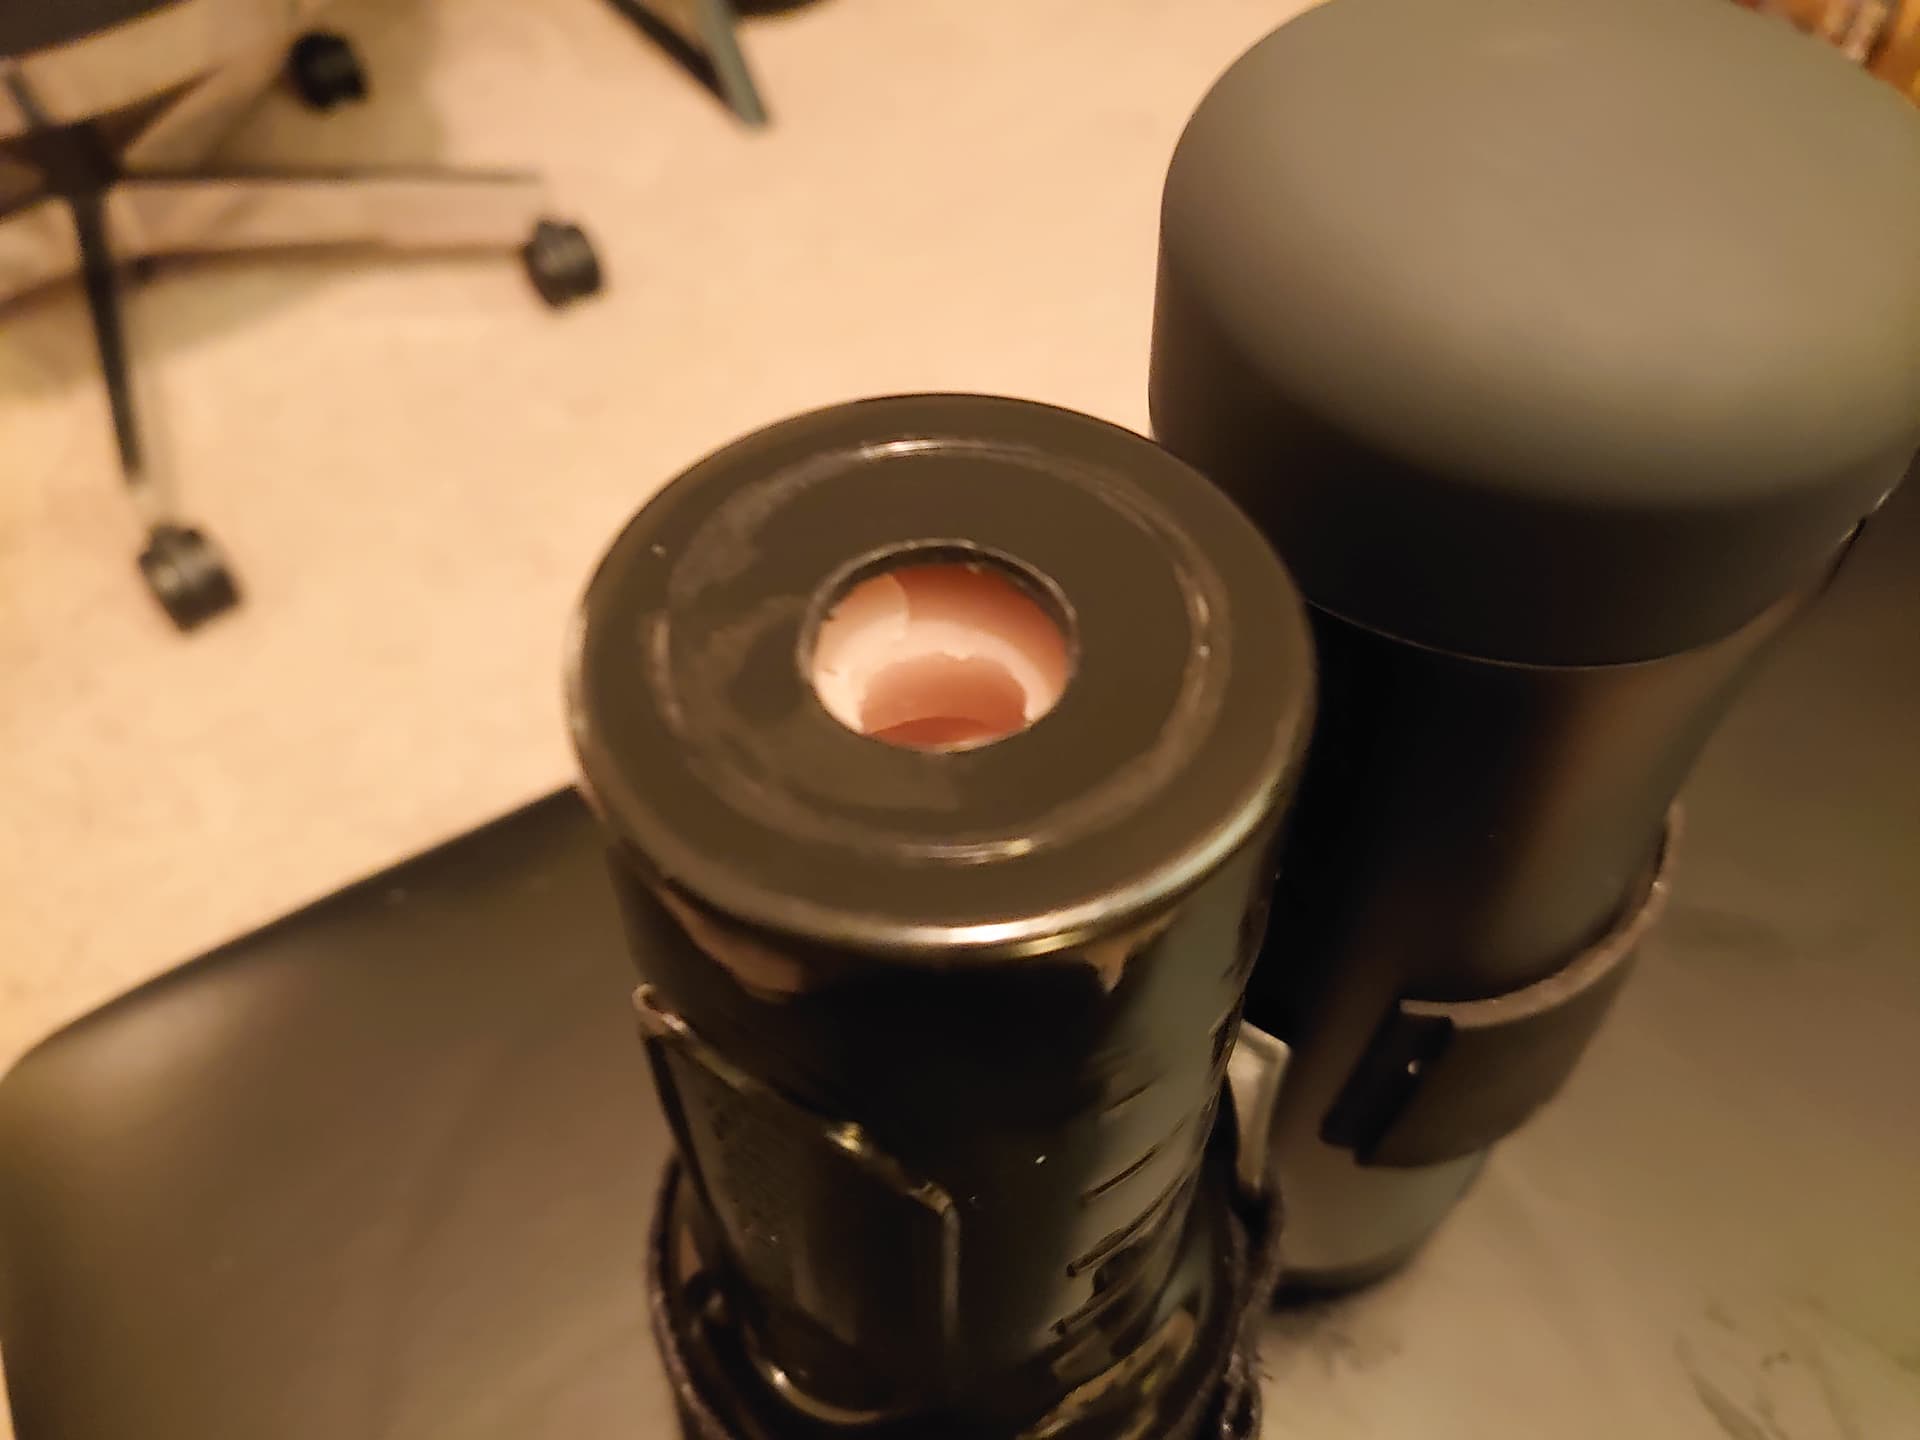
As an added bonus, I’ll give you all a tip on a problem I’ve encountered. So I use my Handy lying down with a Fleshlight Go while wearing a VR headset, mostly for PMV’s and Cock Hero/Fap Hero videos, and through lengthy sessions the lube dries out and it’s a real pain to reapply when you have the headset on, and then it’s also a pain to unscrew the cap of the Fleshlight every time to put lube in it. So my solution for this is to remove the cap of the Fleshlight, and drill a 3/4" hole in the center of it. You can use one of those Christmas tree shaped drill bits for this. Screw the cap back on, and get yourself a small dropper bottle at Hobby Lobby and fill it with your favorite liquid lube. Depending on what brand of dropper bottle you buy, you might have to adjust the size of the hole you drill into the Fleshlight cap, but the caps of my dropper bottle fits perfectly into a 3/4" hole. On the cap of the dropper bottle, drill a 1/16" hole in the center and put it back on the dropper bottle. Now when you’re using your Fleshlight Go with your Handy, all you have to do is stick the bottle with the cap attached into the hole and it will stay in place. Whenever you need to reapply lube, just give the bottle a squeeze and you’re good to go! Make sure not to tighten the cap of the Fleshlight all the way or else the suction will cause all the lube to leak out of the bottle while in use.
21
22
23
24

Let me know if this has helped anybody find a solution!

7 Likes

IMG_20220301_134706

I use the model from defucilis: Universal Hands-Free Handy Mount by defucilis - Thingiverse
And a VESA 100 monitor arm with a C-clamp: https://www.amazon.com/VIVO-Monitor-Adjustable-Articulating-STAND-V001/dp/B00B21TLQU/ref=sr_1_3?crid=NIFXZNLC69ZT&keywords=BONTEC+Single+Monitor+Arm&qid=1646139456&sprefix=bontec+single+monitor+arm%2Caps%2C136&sr=8-3
Works fine for about a month now.

3 Likes

wow. this must be the best documented handy setup i have ever seen ! well done mate.

3 Likes

You print it yourself ?

1 Like

Yes I have :grin:

1 Like

I will probably do the same setup because it’s working in all position. Just have to found a way to print it.

It’s very user friendly now. You can move The Handy in every possible position. You can just find someone in a printer Facebook group to print it?

1 Like

Bed solution:

This laptop bed desk https://www.amazon.com/Adjustable-RAINBEAN-Portable-Workstation-Ergonomic/dp/B086DX4NJG

Add a waterbottle holder, bolt it through the desk heat vent holes, adjust the desk leg height appropriately, use a zip tie for the top of the handy, done. You can add weight or whatever, with no weight it can bounce a bit which is often not a bad thing.

1 Like

You have a pic of that setup ?

What actually also works quite well as a freehand solution when lying down is a heavy large eiderdown / quilt. The thing can be well formed and compressed by folding. With a little trial and error, you can position the Handy so that it moves little or not at all. In addition, the blanket has a sound-dampening effect.

I have something similar and it works quite well: https://www.amazon.com/dp/B089GPHSLP/
Maybe you already have such a thing lying around at home.

il_1588xN.2446779881_h623
I just loop 2 D ring belts to make an adjustable belt that holds the top on the handy and secures the device down and use a pillow the prevent it from tipping towards me. Standing it usually works with no assistance, gravity keeps it in place.

You roll up a large quilt into a cylinder than you tape above and below the handy around the cylindrical blanket rolled up at desired height. Rest the butt end of the rolled up blanket on your abdomen.

1 Like

I’ve been doing a simple setup for hands free (Lying down, in bed) for quite a while and figured I’d share it here if anyone is interested. A lot of pullup bars use a similar design which allows you to fit your legs through while placed on a bed and do hands free easily. I use a pullup bar similar to this one (https://www.amazon.ca/ProsourceFit-Foldable-Doorway-Trainer-Exercise/dp/B08B1DXWH7/ref=sr_1_56?keywords=pull+up+bar&qid=1650695758&sprefix=pull+u%2Caps%2C75&sr=8-56) along with the multi-angle vice which has been discussed in this thread before. I’m posting that link as an example. The pullup bar I use was much less expensive and I’m sure there are other lower-priced ones out there

3 Likes

Hands free couch mount $6.49

Simple long clamp

image

This works on a couch with sections. Load up your handy and place the clamp between the sections.
PXL_20220423_065431999
PXL_20220423_065553731
PXL_20220423_065317721
PXL_20220423_065340889

8 Likes

IMG-0851

Personally, I like this Multi-Axis Vice (Price ranges $20-60; I got mine for $30) mounted to my desk with my desk chair. My chair can fold almost 180 degrees so I can be sitting or laying at almost any angle.

No other tools or stuff needed to mount the Handy. You just need to line it up correctly so the wifi button is barely unobstructed and tighten slowly until it is firmly attached to the clamp (do not over tighten unless you plan on cracking the clamshell).

You can also flip it upside down and angle it so you can have a hands free standing experience.

Also the FL Flight series works perfectly and does not slow down the Handy or pose the issues found with the full sized FLs (smaller & much lighter than the full sized FLs but still give you full-ish coverage). I own the entire Flight series and personally recommend the FL Flight Aviator.

9 Likes

I’ve got one of these but it makes so much noise that I rarely get to use it. Shakes my desk to the point it’s audible on the floor below. Sounds like I’m on a running machine.

buying the little tablet stand and paying a site like craftcloud to 3d print the attachment have been the best solution for me, probably $35 spent toal

Any chance you could post a picture?

Depending on your surroundings, velcro. Although the motor at the top can warm the adhesive and make it unstick unless you use a large strip on the smoother part of the plastic area around a good portion of the diameter. Might be a way to incorporate a velcroed metal bracket or angle piece in between the Handy and the right spot for mounting the setup according the the video its for. I lucked out with spots on my desk to mount both vertically and horizontally. Be careful with a horizontal mount because the Handy might need to sit ‘face’ down with the slider exposed. Excess lube can drip into the inside. I use the True grip Gen 2 Sleeve, it has a lip on the inside at the opening that helps. Hope this helps.

1 Like

Hi all,

this is my first post. I have silently enjoyed this community and all it has to offer. The Handy is truly a great product, and I’m glad to see such a beautiful inventions regarding the hands-free control of The Handy. it really takes the device to a next level.

I also invented something while I was at home in quarantine. I thought it’d be my turn to give something, a smile at least, since the inventions here tend to be very high tech! My invention consists only of stuff I had laying around my house.

So, behold, my hands-free Handy invention, The Milkmaid.

It includes:
1x a plastic industrial milk box,
2-4x pillows,
2x silk cravats,
1x leather guitar strap

A pillow is placed on the bottom of the box and then The Handy is tightened with the cravats (the cravat’s can be tied on the bottom of the box, since the box’s bottom is a plastic grid. At this point, the hands-free box is already fantastically working solution. It could be used while laying down or sittting on top of the box in squat position (I attached one body pillow under my thighs to make it extra comfy.)

However, I wanted to make it even better by attaching one more pillow under the cravats’ knots, so The Handy is placed more firmly and aligned a little better (it’s tilted more upwards, secured that any skin doesn’t interfere with the motor’s movement). Lastly, I added a guitar strap so I can use it while standing. It’s like selling donuts at a football tournament, or something like that, but instead of having shitty time selling donuts and wasting my life, I’m making love with the sexiest industrial milk box ever!

I still think squatting is the most enjoyable position with The Milkmaid, it’s like taking a relaxing dump, but better.

Here are pictures:

The Milkmaid:
BreadBasketHandyInvention

Side:
IMG_20220506_172248

Bottom:
IMG_20220506_174541

Standing with The Milkmaid attached:
IMG_20220506_175052

Squatting on the The Milkmaid:
IMG_20220506_175115

Hope you enjoyed my invention and I encourage everyone to try to build their own! It’s quite simple and really fun.

8 Likes