This is now obsolete. Please see this new topic for a better tool/process.
When I started looking into this, I hoped to be able to give Whisper an audio file and get an almost perfect .srt. Unfortunately, it’s not “there” yet. Whisper rarely gets the right timing for subtitles (at least for Japanese). It also often hallucinate text (ex. “Please Like And Subscribe” or “Thanks for watching” at random spots because it was trained with a lot of YouTube content) and goes into a loop and repeats the same text over and over.
I finally ended up “helping” Whisper to keep it on track. I also used ChatGPT to get better translations, mostly because it’s possible to give it a context for the translation.
Hopefully, Whisper will mature and a future release will be more useful for my use case (i.e. subtitle for JAV VR) and this guide can be simplified.
Important:
THIS IS STILL A WORK IN PROGRESS but it’s working well for me.
So, here is the guide (version 1.2).
Yes, it has a lot of steps but, once everything is set up, it goes relatively fast (i.e. about twice times the length of the video, depending on the number of subtitles). For example, it took me 1h to make the subtitle for a 30 minutes video.
-
Setting up.
Steps.
a. Download and install the latest version of FunscriptToolbox (at least version 1.1.0) somewhere on your machine.
b. Download and install the latest version of SubtitleEdit somewhere on your machine.
c. Create a new folder (ex. SubtitleCreation) somewhere.
d. Put this file in the folder:
FunscriptToolboxSubtitles.v1.1.1.bat.txt (1.5 KB)e. Remove “.txt” in the file name.
f. In the batch file, put the path of your FunscriptToolbox folder on the “set path line”
 ```
 @echo off

 set path=C:\AwesomeTools\FunscriptToolbox;%path%

 echo --- subtitles.video2vadsrt ---
 ...
 ```
g. I suggest creating a shortcut to SubtitleEdit.exe in the folder.
h. Move the videos that need subtitles to the folder.
i. At the end, your folder should look like this.

-
Start FunscriptToolboxSubtitles.bat for the first time.
Python is needed for this step. Expand this section for more info.
For this step, FunscriptToolbox will call a python script. You might need to install python. I’m using version 3.9 (the latest version is not compatible with some image generation AI that I use).
The application assumes that you installed python with the option “Add python to Path” checked. If not, you will have to add the path to python on the “set path” line in the batch file.
From what I can gather (thanks, @lebeastmode, @spacemanbob), the following command needs to be executed in a command prompt to install the needed modules:
pip3 install torch torchvision torchaudio soundfile IPython --extra-index-url https://download.pytorch.org/whl/cu116If you don’t want to install Python, you can also add --skipvad option to the “subtitles.video2vadsrt” step of the batch file. With this option, it will create an empty .srt file but you’ll have to do more work in SubtitleEdit in the next step.
For each video file, it will extract a “(video name).temp.vad.wav” file from the audio tracks.
I will also create a “(video name).temp.vad.srt” that contains a subtitle entry for each voice detected (with no text). -
At this point, the working folder will look like this:
-
Use SubtitleEdit to make a “perfect VAD” file.
Steps.
a. Start SubtitleEdit.
b. Drag the “(video name).temp.vad.srt” over the subtitles list.
c. Drag the “(video name).mp4” over the video section.
d. Adjusts the subtitles (while ignoring the text column for now).
Which means adjusting the start and end of every entry generated by VAD.
Deleting extra subtitles (ex. moaning).
Adding missing subtitles if needed.
Don’t extend the length of the subtitle too much, it makes Whisper “misbehave” more. FunscriptToolbox will extend all subtitles at the last stage of the process.e. Choose the menu “File\Save As…”
f. Save the file as “(video name).temp.perfect-vad.srt”.
g. Close SubtitleEdit for now.
-
Rename the file “(video name).temp.vad.wav” to “(video name).temp.perfect-vad.wav”.
-
Start FunscriptToolboxSubtitles.bat again.
This time will use the “perfect VAD” to create files optimized for OpenAI Whisper.
The file “(video name).temp.perfect-vad.whisper.wav” contains only the audio from VAD sections found in “(video name).temp.perfect-vad.srt”, separated by 1 to 2 seconds of silence.
The file “(video name).temp.perfect-vad.whisper.offset” contains the offset that will be used to recreate a .srt file synchronized to the full wav/mp4 after Whisper has transcribed the audio.
A file “(video name).temp.perfect-vad.whisper.newvad.srt” is also created. This file is not really needed for the process but can sometimes be useful.
-
At this point, the working folder will look like this:
A folder “(video name).temp.perfect-vad_wav_chunks_ID” will also appear. -
Time to transcribe the audio using OpenAI Whisper.
Steps.
a. Open this link in a browser:
Google Colabb. Start the first step “git clone” of the collab template and wait for it to finish.
c. Accept the warning that will pop up (note: this is not my collab template).
d. Skip the second step and start the third step “pip install requirements”, and wait for it to finish.
e. Start the fourth step “python app.py”.
f. When a link to a public URL shows up, click on it (i.e. https://(id).gradio.app).
g. On the page, for model, choose “large-v2”.
h. For Language, choose the audio language (ex. “Japanese”).
i. Drag the “(video name).temp.perfect-vad.whisper.wav” to the Upload Files section.
You can convert multiple files if you like.j. For Task, choose “transcribe”.
k. For VAD, choose “none” (important because we already did a “better” VAD previously).
l. Click “Submit”
m. Wait for the transcription to complete. It usually take about 5 minutes for a 30 minutes wav file (70MB).
n. When done, download the .srt file (or the zip file, if you converted multiple files). You can download the other files too but they aren’t needed.
o. Clear the file list by clicking the X:
p. Drag all the .wav files from the folder “(video name).temp.perfect-vad_wav_chunks_ID” to whisper Download (after ‘deleting’ the old list), and then submit.
p. When done, download the .zip file and unzip it into the folder “(video name).temp.perfect-vad_wav_chunks_ID”.
q. If you won’t use the collab machine for a while, go back to the collab tab and disconnect and delete the runtime.

-
Rename the .srt file generated by whisper to “(video name).temp.perfect-vad.whisper.srt”
-
Start FunscriptToolboxSubtitles.bat again.
This time, it will use the “(video name).temp.perfect-vad.whisper.offset” file to move the subtitles from “(video name).temp.perfect-vad.whisper.srt” back to their original spot (i.e. synchronized to the original video) and create a “(video name).temp.perfect-vad.whisper.jp.srt” file.
Note: It usually works well but it’s still not full-proof.
-
At this point, the working folder will look like this:
-
Use SubtitleEdit to do a basic translation with Google / Yandex.
Option A: Use website to get a Google and Yandex translation
a. Open this link in a browser: Subtitle Translator - Translate & Edit Subtitles
b. Drag the .srt file in the box.
c. Select Yandex / English and click on Translate.
d. Wait for the translation.
e. Save the file and rename it to (video name).temp.perfect-vad.whisper.jp.yandex.en.srt.
f. Reopen: Subtitle Translator - Translate & Edit Subtitles
g. Drag the .srt file in the box.
h. Select Google / English and click on Translate.
i. Wait for the translation.
j. Save the file and rename it to (video name).temp.perfect-vad.whisper.jp.google.en.srt.Option B: Use SubtitleEdit (only support Google translation)
a. Start SubtitleEdit.
b. Drag the “(video name).temp.perfect-vad.whisper.jp.srt” over the subtitles list.
c. Choose the menu “Auto-translate \ Auto-translate…”
d. Select the right “From” and “To” language (ex. Japanese to English) then click “Translate”.
e. When the translation is done, click “OK”.
f. Choose the menu “File\Save As…”
g. Save the file as “(video name).temp.perfect-vad.whisper.jp.google.en.srt”.
(And, yes, there is some logic & need for this file-naming madness. )
)h. Close SubtitleEdit for now.
-
Start FunscriptToolboxSubtitles.bat yet again.
This time, it will use the file “(video name).temp.perfect-vad.whisper.jp.srt” to create a “(video name).temp.perfect-vad.whisper.jp.gptprompts” file that contains “prompts” that can be fed to OpenAI ChatGPT.
It will also use the file “(video name).temp.perfect-vad.whisper.jp.google.en.srt” to create a “(video name).temp.perfect-vad.whisper.jp.gptresults” file.
-
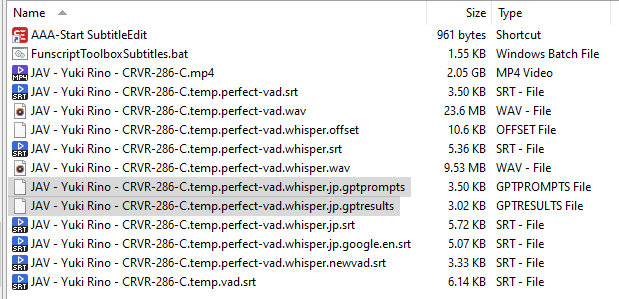
At this point, the working folder will look like this:
-
Load both files (gptprompts & gptresults) in your favorite text editor (ex. Notepad++).
-
Open DeepL translation in a browser, copy the Japanese text from the start of the .gptresults file and paste it into DeepL (split the text if needed since there is a 5000 characters limit). Copy the DeepL translations, and paste them at the end of the same file (i.e. .gptresults).
-
It’s now time to translate using OpenAI ChatGPT.
Note: Now, I’m usually skipping this step since DeepL translations are pretty good. Instead, on step 20, I open ChatGPT and ask for its input if a translation doesn’t seem to be good. Something like:
I read this in a Japanese romance novel, it’s what the women say to the men while they are having sex.
私後ろからの方が引きやすいです
What does it mean ?
And what would be a good “one sentence” translation in english?Steps
a. Open this link in a browser: https://chat.openai.com/chat
(you might need to create an account on https://openai.com first).b. Create a new chat.
c. From the gptprompts file, send “instructions” text and the first 30 lines of texts (I added a few empty lines every 30 entries).
d. Wait for GPT to translate the batch of texts, then feed it the next 30 lines of texts.
e. When it’s done, copy all the text from the page (with Ctrl+A, Ctrl-C) and paste it at the end of the .gptresults file.
f. ChatGPT will often say “Oh, this is not appropriate content for my prude little machine brain” but it will continue to translate anyway. I ignore it.
g. Sometimes, it will say, “No, this is too much for me, I won’t continue”.
In that case, copy all the text that you got so far from the page (with Ctrl+A, Ctrl-C) and paste it at the end of the .gptresults file.
And then, recreate a new chat. Re-paste the instruction and continue about 10 lines before it stopped. For example, if it stopped translating at line [0090], restart at lines [0080]. It works best if it has a little bit of context.|
-
When you are done with the translation, start FunscriptToolboxSubtitles.bat yet again.
This time, it will use the file “(video name).temp.perfect-vad.whisper.jp” and extract all GPT responses from “(video name).temp.perfect-vad.whisper.jp.gptresults” and create a file “(video name).temp.perfect-vad.whisper.jp.en.srt”.
[/details] -
At this point, rename:
“(video name).temp.perfect-vad.whisper.jp.en.srt” to “(video name).srt”.
And
“(video name).temp.perfect-vad.whisper.jp.srt” to “(video name).jp.srt”. -
Back to SubtitleEdit for the last part (you might do a first pass in a text editor too).
-
You can finally delete all the .temp files if you want
.